
Deploying a WordPress application on top of K8S with AWS RDS by using Terraform
Problem Statement:
- Write an Infrastructure as code using Terraform, which automatically deploy the WordPress application
- On AWS, use RDS service for the relational database for WordPress application.
- Deploy the WordPress as a container on top of Minikube.
- The WordPress application should be accessible from the public world, expose it.
Amazon Relational Database Service (Amazon RDS) is a web service that makes it easier to set up, operate, and scale a relational database in the AWS Cloud. It provides cost-efficient, resizable capacity for an industry-standard relational database and manages common database administration tasks.
Overview of Amazon RDS
Why do you want a managed relational database service? Because Amazon RDS takes over many of the difficult and tedious management tasks of a relational database:
- When you buy a server, you get CPU, memory, storage, and IOPS, all bundled together. With Amazon RDS, these are split apart so that you can scale them independently. If you need more CPU, less IOPS, or more storage, you can easily allocate them.
- Amazon RDS manages backups, software patching, automatic failure detection, and recovery.
- To deliver a managed service experience, Amazon RDS doesn’t provide shell access to DB instances. It also restricts access to certain system procedures and tables that require advanced privileges.
- You can have automated backups performed when you need them, or manually create your own backup snapshot. You can use these backups to restore a database. The Amazon RDS restore process works reliably and efficiently.
- You can use the database products you are already familiar with: MySQL, MariaDB, PostgreSQL, Oracle, Microsoft SQL Server.
- You can get high availability with a primary instance and a synchronous secondary instance that you can fail over to when problems occur. You can also use MariaDB, Microsoft SQL Server, MySQL, Oracle, and PostgreSQL read replicas to increase read scaling.
- In addition to the security in your database package, you can help control who can access your RDS databases by using AWS Identity and Access Management (IAM) to define users and permissions. You can also help protect your databases by putting them in a virtual private cloud.
About the Project:
In this project we will launch the WordPress application on top of Kubernetes by using Minikube and the Database connectivity to WordPress application would be provided by AWS through its RDS service . For exposing the WordPress application to the outside world a NodePort service would be created so that client can access the application .This whole Infrastructure would be launch by using Terraform.
Prerequisites:
- AWS CLIv2 installed and configured with IAM user.
- Minikube and Terraform installed.
- Kubectl would be configured.
Let’s start the project
Step-1. Set provider for AWS in Terraform
provider "aws" {region = "ap-south-1"profile = "mittal"}
Set provider Kubernetes in Terraform
provider "kubernetes" {
  config_context_cluster   = "minikube"
}
Step-2. Create a Security group for RDS:
- Code:
resource "aws_security_group" "mysql-rds" {
name        = "RDS-Security-Group"
  description = "MySQL Ports"

  ingress {
    description = "Mysql RDS"
    from_port   = 3306
    to_port     = 3306
    protocol    = "tcp"
    cidr_blocks = ["0.0.0.0/0"]
  }
  egress {
    from_port   = 0
    to_port     = 0
    protocol    = "-1"
    cidr_blocks = ["0.0.0.0/0"]
  }
tags = {
    Name = "Mysql-RDS"
  }
}- Use resource aws_security_group for creating the Security group for RDS , and in this SGs add one rule which allow incoming traffic on MySQL port(3306) number.
Step-3. Create a RDS:
- Code:
resource "aws_db_instance" "default" {
  allocated_storage    = 20
  storage_type         = "gp2"
  engine               = "mysql"
  engine_version       = "5.7"
  instance_class       = "db.t2.micro"
  name                 = "myrdsdb"
  username             = "anurag"
  password             = "hmctask6pass"
  parameter_group_name = "default.mysql5.7"
  publicly_accessible = true
  skip_final_snapshot = true
  vpc_security_group_ids = [aws_security_group.mysql-rds.id]
  tags = {
  name = "RDS"
   }
depends_on = [
    aws_security_group.mysql-rds,
  ]
}- Use resource aws_db_instance for creating AWS RDS and passing the id of SGs in vpc_security_group_ids
- Use publicly_accessible so that we are able to access it.
- Use depends on aws_security_group.mysql-rds so that RDS code will execute after complete execution of aws_security_group.
Step-4. Create Deployment of Wordpress:
- Code
resource "kubernetes_deployment" "wp" {
depends_on = [
    aws_db_instance.default,
  ]
  metadata {
    name = "wordpress"
    labels = {
      app = "wordpress"
    }
  }
spec {
    replicas = 1
selector {
      match_labels = {
        app = "wordpress"
      }
    }
template {
      metadata {
        labels = {
          app = "wordpress"
        }
      }
spec {
        container {
          image = "wordpress"
          name  = "wp"
        }
      }
    }
  }
}- Use resource kubernetes_deployment for making deployment of Wordpress.
- Now provide the metadata, template, selector, replica, and image name(Wordpress).
Step-5 . Creating Nodeport Service for Wordpress Deployment:
- Code:
resource "kubernetes_service" "wp-expose"{
 depends_on = [
     kubernetes_deployment.wp,
   ]
  metadata {
    name = "wp-expose"
  }
  spec {
    selector = {
      app = kubernetes_deployment.wp.metadata.0.labels.app
    }
    port {
      node_port = 30001
      port        = 80
      target_port = 80
    }
    type = "NodePort"
  }
}- Use resource kubernetes_service for making services of deployment.
- Now use service type as Nodeport to expose the Wordpress Application to client.
Command to run code:
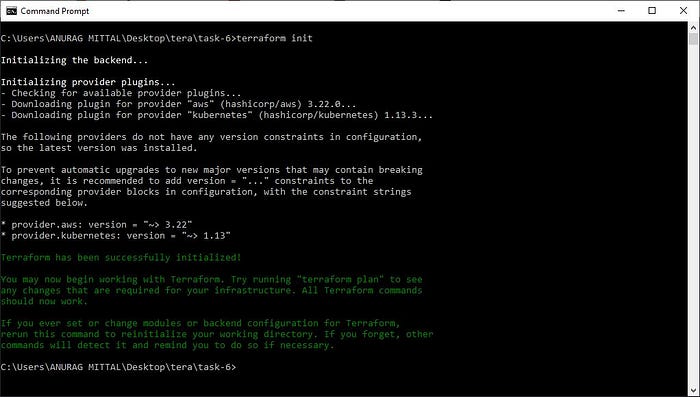
terraform init - init for Initialization terraform plugins.
output —
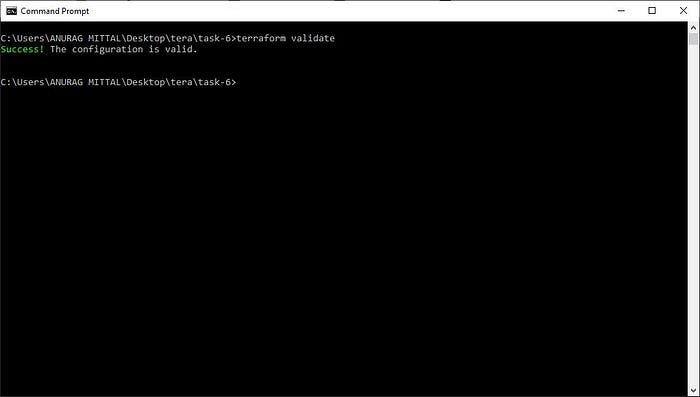
terraform validate- validate for check configuration is valid or not
output —
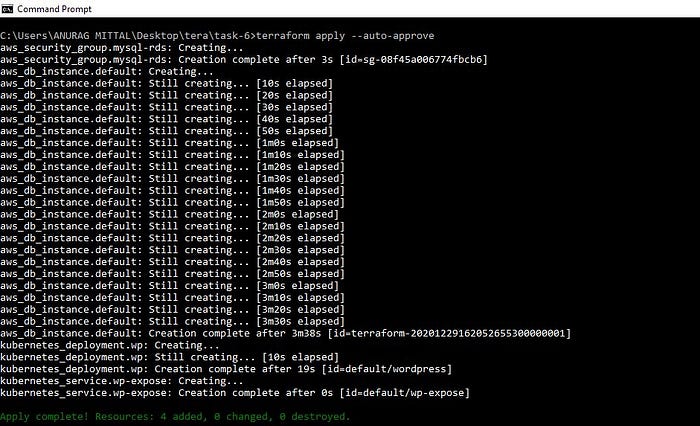
terraform apply --auto-approve- apply to run the terraform code.
output —
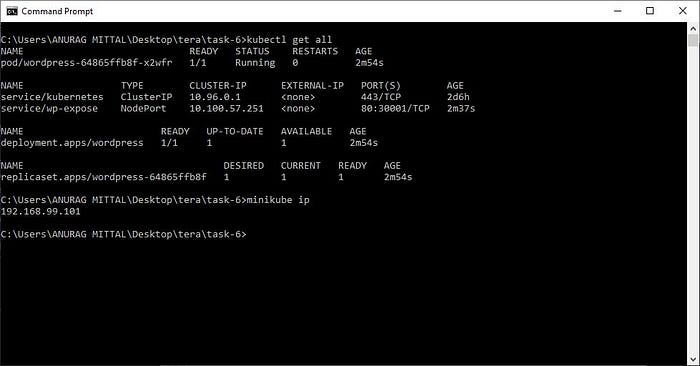
kubectl get allTo check all the resources of k8s that are in active phase
output —
Final output
RDS has been configured successfully

SG for RDS has been created successfully

Wordpress setup: —
Select language

click on lets go

- Now you need to provide the DB name ,user name , password, and for Database Host use RDS Endpoint.

click on Run the installation

Fill all the information

Click on log in

Login via username and password

WordPress Dashboard

Blog that has been created on top of Wordpress

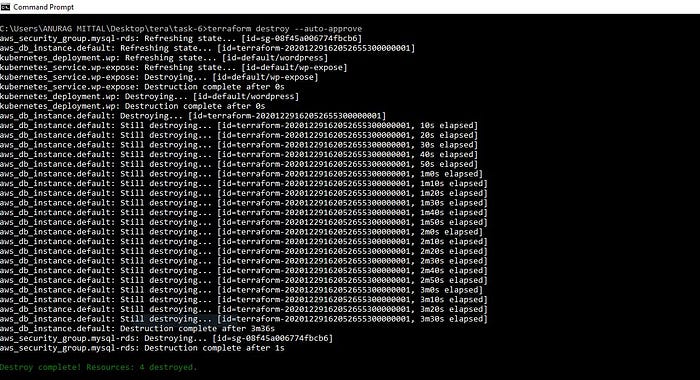
To destroy or delete the whole infrastructure that has been created with the help of Terraform
terraform destroy --auto-approveoutput —
Github link —
